PNM program
PNM (Prospective New Member) is GreekManage's recruitment / intake module. It handles the journey from a person submitting an application through being initiated as a member.
New to PNM? Start with the PNM admin onboarding — it walks you through the critical-path settings (org slug, period, attachments, references, consents) in about 30 minutes.
What does the applicant see? Applying as a PNM is the public-facing flow your prospects go through.
Deep dives for each settings card and major feature: General config · Required fields · Application questions · Attachments · Reference letters · GPA gate · Email verification · Consents · Public page · Notification routing · Periods
Lifecycle overview
A PNMProfile tracks intake status through these states:
not_started → approved → in_progress → completed (crossed)
                                     → rejected
Practically:
- Applicant submits the public apply page → PNM record created (intake_status = not_started).
- Org or chapter reviews and approves the applicant (intake_status = approved).
- Intake begins — name assignment, pledging activities, etc. (intake_status = in_progress).
- Member crosses; the underlying Membership is updated to Undergraduate (intake_status = completed).
- If the applicant is rejected at any point, intake_status = rejected.
Configure PNM settings
Org → PNM → Settings.
Settings are organized into cards:
- General — period defaults, intake configuration
- Public Page — header text, intro markdown, and per-org slug (used in your apply URL:
https://[your-app-domain]/apply/[your-org-slug]) - Required Fields — toggle which standard PNMProfile fields are required (birth date, place of birth, address, ethnicity, GPA, degree type, year in college, expected graduation, organizations, achievements, etc.)
- Custom Questions — add org-specific questions (free-form
application_answerskeyed by question ID) - GPA Gate — optional minimum GPA; submissions below threshold are soft-flagged (
auto_flagged = true) for admin review - Attachments — see below
- Reference Letters — see below
- Consents — pick which org Consent Templates applicants must accept
- Email Verification — optionally require applicants to confirm their email before the application enters the regular not_started lifecycle
- Intake Rules — chapter / region approval expectations
- Notification Routing — chapter-officer per-application emails plus national admin daily digest (v0.58)
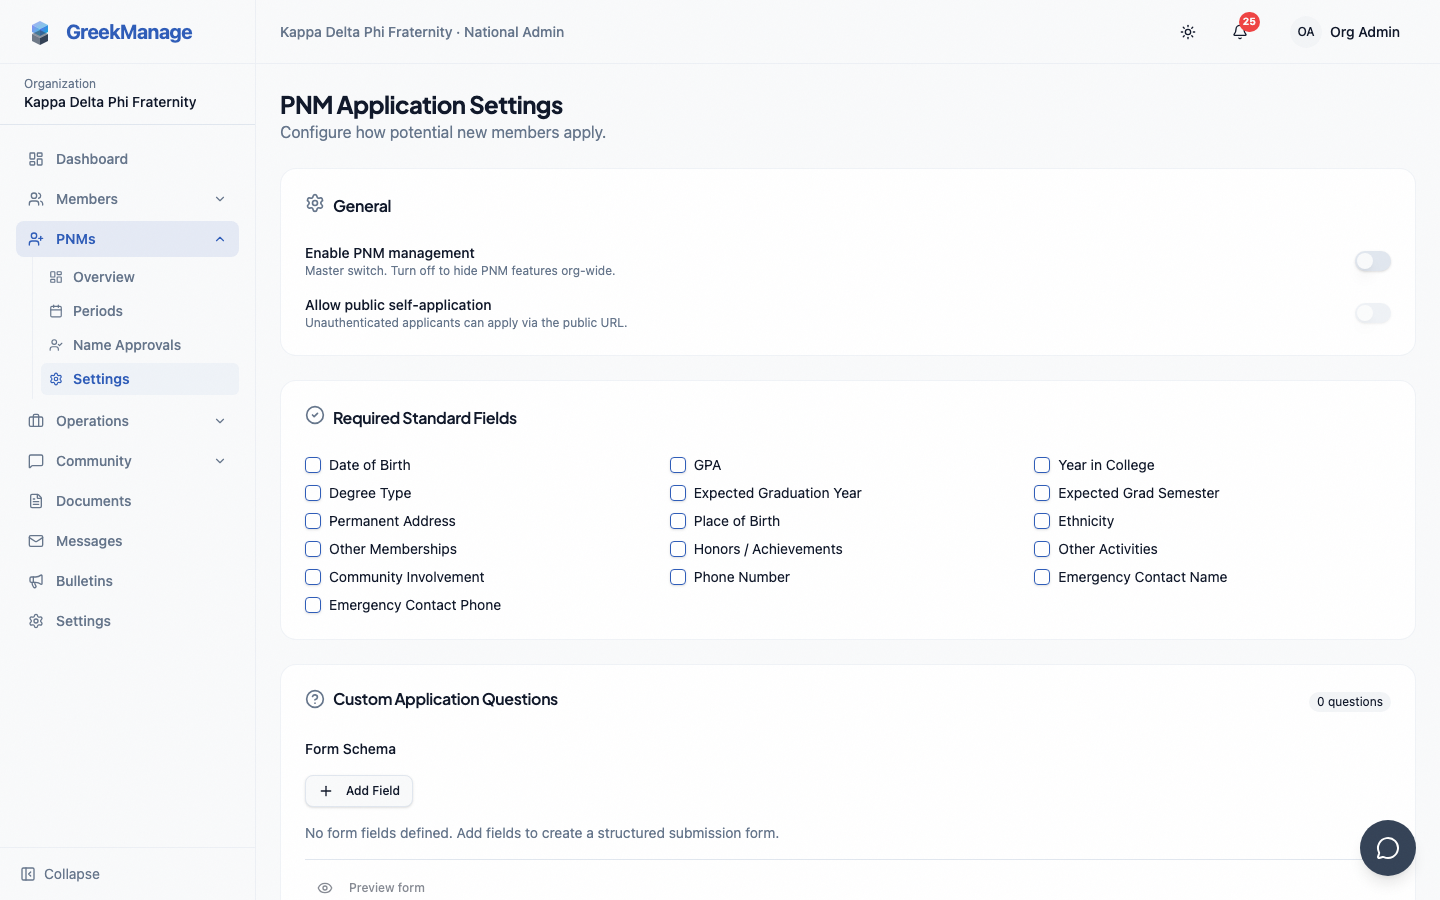 PNM settings — application form and consent.
Attachments
The Attachments settings card lets you require applicants to upload supporting files during the public apply flow.
Supported types:
- Resume — PDF, DOC, DOCX (10 MB max)
- Headshot — JPEG, PNG, WebP (10 MB max)
- Transcript — PDF, DOC, DOCX (10 MB max)
- Cover Letter — PDF, DOC, DOCX (10 MB max)
To enable:
- Open Org → PNM → Settings.
- In the Attachments card, check the types you want applicants to provide.
- Click Save.
What happens at submit time:
- Every checked type becomes required on the public apply page — applicants see a labelled drag-and-drop uploader for each.
- The server validates uploaded files via magic-byte sniffing (not just the client-declared content type), enforces the 10 MB cap, and rejects extension/type mismatches before the PNM record is created.
- If a required attachment is missing or invalid, the submission fails with a 400 — no dangling PNM rows.
Reviewing attachments:
- The PNM detail page (chapter or org view) shows an Attachments section with each upload's type, filename, size, and uploader.
- Org admins, regional admins, and the original uploader can delete an attachment; chapter officers cannot delete uploads they didn't make themselves.
Self-upload after the fact:
The applicant (and their chapter officers) can upload additional attachments later via POST /api/pnm-profiles/<id>/attachments/ — useful when a transcript wasn't ready at apply time.
Reference letters
The Reference Letters settings card lets you require N reference letters per applicant (0–5). The system handles invitation, collection, and tracking automatically.
Configure:
- Open Org → PNM → Settings.
- In the Reference Letters card, set "Required reference letters" to the number you want (1–5).
- Save.
What happens at submit time:
- The public apply page renders N email/name input pairs in a "Reference letters" block. Applicants must supply N unique referrer emails (none equal to their own email).
- After the PNM is created, the system mints a one-time-token magic link per referrer and emails each one. Tokens are single-use, expire after 7 days, and are stored only as a sha256 hash (the plaintext is never persisted).
- Each referrer clicks the link in their email and lands on
/reference/<token>. They submit a brief letter (minimum 50 characters) plus an optional file. Distinct UI states cover already-submitted (409), expired (410), and unknown (404) tokens. - On successful submission, the same chapter-officer / national-admin notification flags from your routing config fire — admins are alerted that a new letter has landed.
Reviewing letters:
- The PNM detail page shows a References section with one row per letter: status badge (Pending / Submitted / Expired), referrer email + name, sent/expires/submitted timestamps, expandable letter body, and a download link for any uploaded file.
- For pending letters, admins see a Resend button that mints a fresh token and re-fires the invitation email — useful when a referrer says they didn't get the original.
Throttle: the public referrer endpoints are rate-limited to 5 requests per hour per IP. The applicant flow itself is unaffected.
Manage PNM periods
A period is a recruitment window (e.g., "Fall 2026 Rush"). Periods scope applications and analytics. Periods are always org-wide — all chapters under an org rush together.
Create a period
- Open Org → PNM → Periods.
- Click New period.
- Set:
- Academic year (e.g., 2026)
- Semester — Fall, Spring, or Summer
- Status — Draft, Active, Closed
- Open date / close date — bound the application window
- Closed message (markdown) — shown on the public apply page outside the open/close window
- Save.
The combination of (organization, academic_year, semester) is unique. When the period status is Active and now is between open_date and close_date, the public apply page accepts submissions for that period.
Public apply page
Each org has a public apply URL: https://[your-app-domain]/apply/[your-org-slug] (or your custom domain).
Anyone can submit an application. The form is generated from your settings.
After submitting, the applicant:
- Gets a confirmation email with their tracking ID.
- Their info goes to the chapter(s) they selected.
- Chapter officers see them in PNMs queue.
Name approvals
The approval flow varies by org policy. Most common: chapter approves first, then org admin reviews and approves names submitted by chapters.
As an org admin
- Open Org → PNM → Name approvals.
- Review pending names — each shows the applicant's info, the recommending chapter, and any chapter notes.
- Click Approve or Decline with comments.
Approved names move to PNM status in the system. Declined names get a notification (the chapter delivers it to the applicant).
Rejection
If an applicant is found ineligible after submission, mark them as rejected from the PNM detail view (sets intake_status = rejected and stamps rejected_at). Admin notes are private to admins; the applicant gets a rejection notification.
What's not built today
- No dedicated bid-management workflow (no "Bidded" intake status, no bid acceptance page surfaced to PNMs). Bid coordination today happens outside the platform; mark applicants approved → in_progress → completed (crossed) as their actual lifecycle progresses.
- No reusable disqualification reason picker — admins add free-form notes when rejecting.
- No custom domain for the apply page — the URL is always under your GreekManage host with your org slug.
Tips
- Test the public apply page before each period. Submit a fake application end-to-end.
- Review chapter approvals daily during peak periods. Lag in your queue creates lag in chapters' recruiting.
- Archive old periods. Keep dashboards clean by archiving 2+ year old periods (data is preserved).
Related
- Module: Operations
- Custom fields — customize the apply form
- Consent templates — required at application
Last verified against v0.62.1 (2026-05-10).